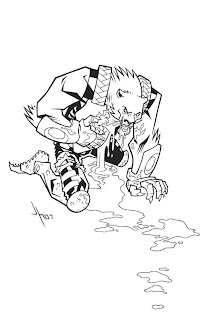
 Once I am happy with the pencil drawing I ink the image. Nowdays I use PITT brush markers and some pens, these are so much faster for me than a "real" brush. In this stage the design changed a bit as we decided to leave out the cast shadow.
  I scan the finished ink drawing into Photoshop, where I color it. Although in this case there is not much actual color :) I like to try to design a cover to "pop", that is why I decided to color most of it in gray tones excpt for the blood.
 That is pretty much my process for most pages, although I am always trying new things in hopes I may find a faster/better method. Also dependng on how comfortable I am with whatever I am drawing, sometimes my pencils are much looser than above.
The Motor City Con came and went. It was fun. I met some nice people. This was the third year in a row I did a Iron Giant commision for this guy who has an amazing collection of Iron Giant original art. The Simon Bizley one is humbling. Check them all out here-
http://ultimateirongiant.com/origart/origart.php
